Intial Folds
I started my fold process with some basic, initial folds. These came instantly to my head. It kind of progressively became a paper fan.
Pushing the boundaries of creativity. I must find fifty different ways to fold a square piece of plain paper.

- Fold a square piece of paper (min size 100mm x 100mm) in 50+ different ways. Take 50+ considered photographs of your three favourite folds.
- Choose your three favourite photographs, describe them.
- Choose one final photograph, and write a reflection about why you favour your chosen photo over your second and third favourites.


I started my fold process with some basic, initial folds. These came instantly to my head. It kind of progressively became a paper fan.
Next, I built on my initial folds and explored various patterns, while still keeping it fairly basic.


From the fifty paper models, I chose my three favourites. I then took just over fifty photos of these models, with each photo highlighting a different aspect of the model such as angle, texture, form.


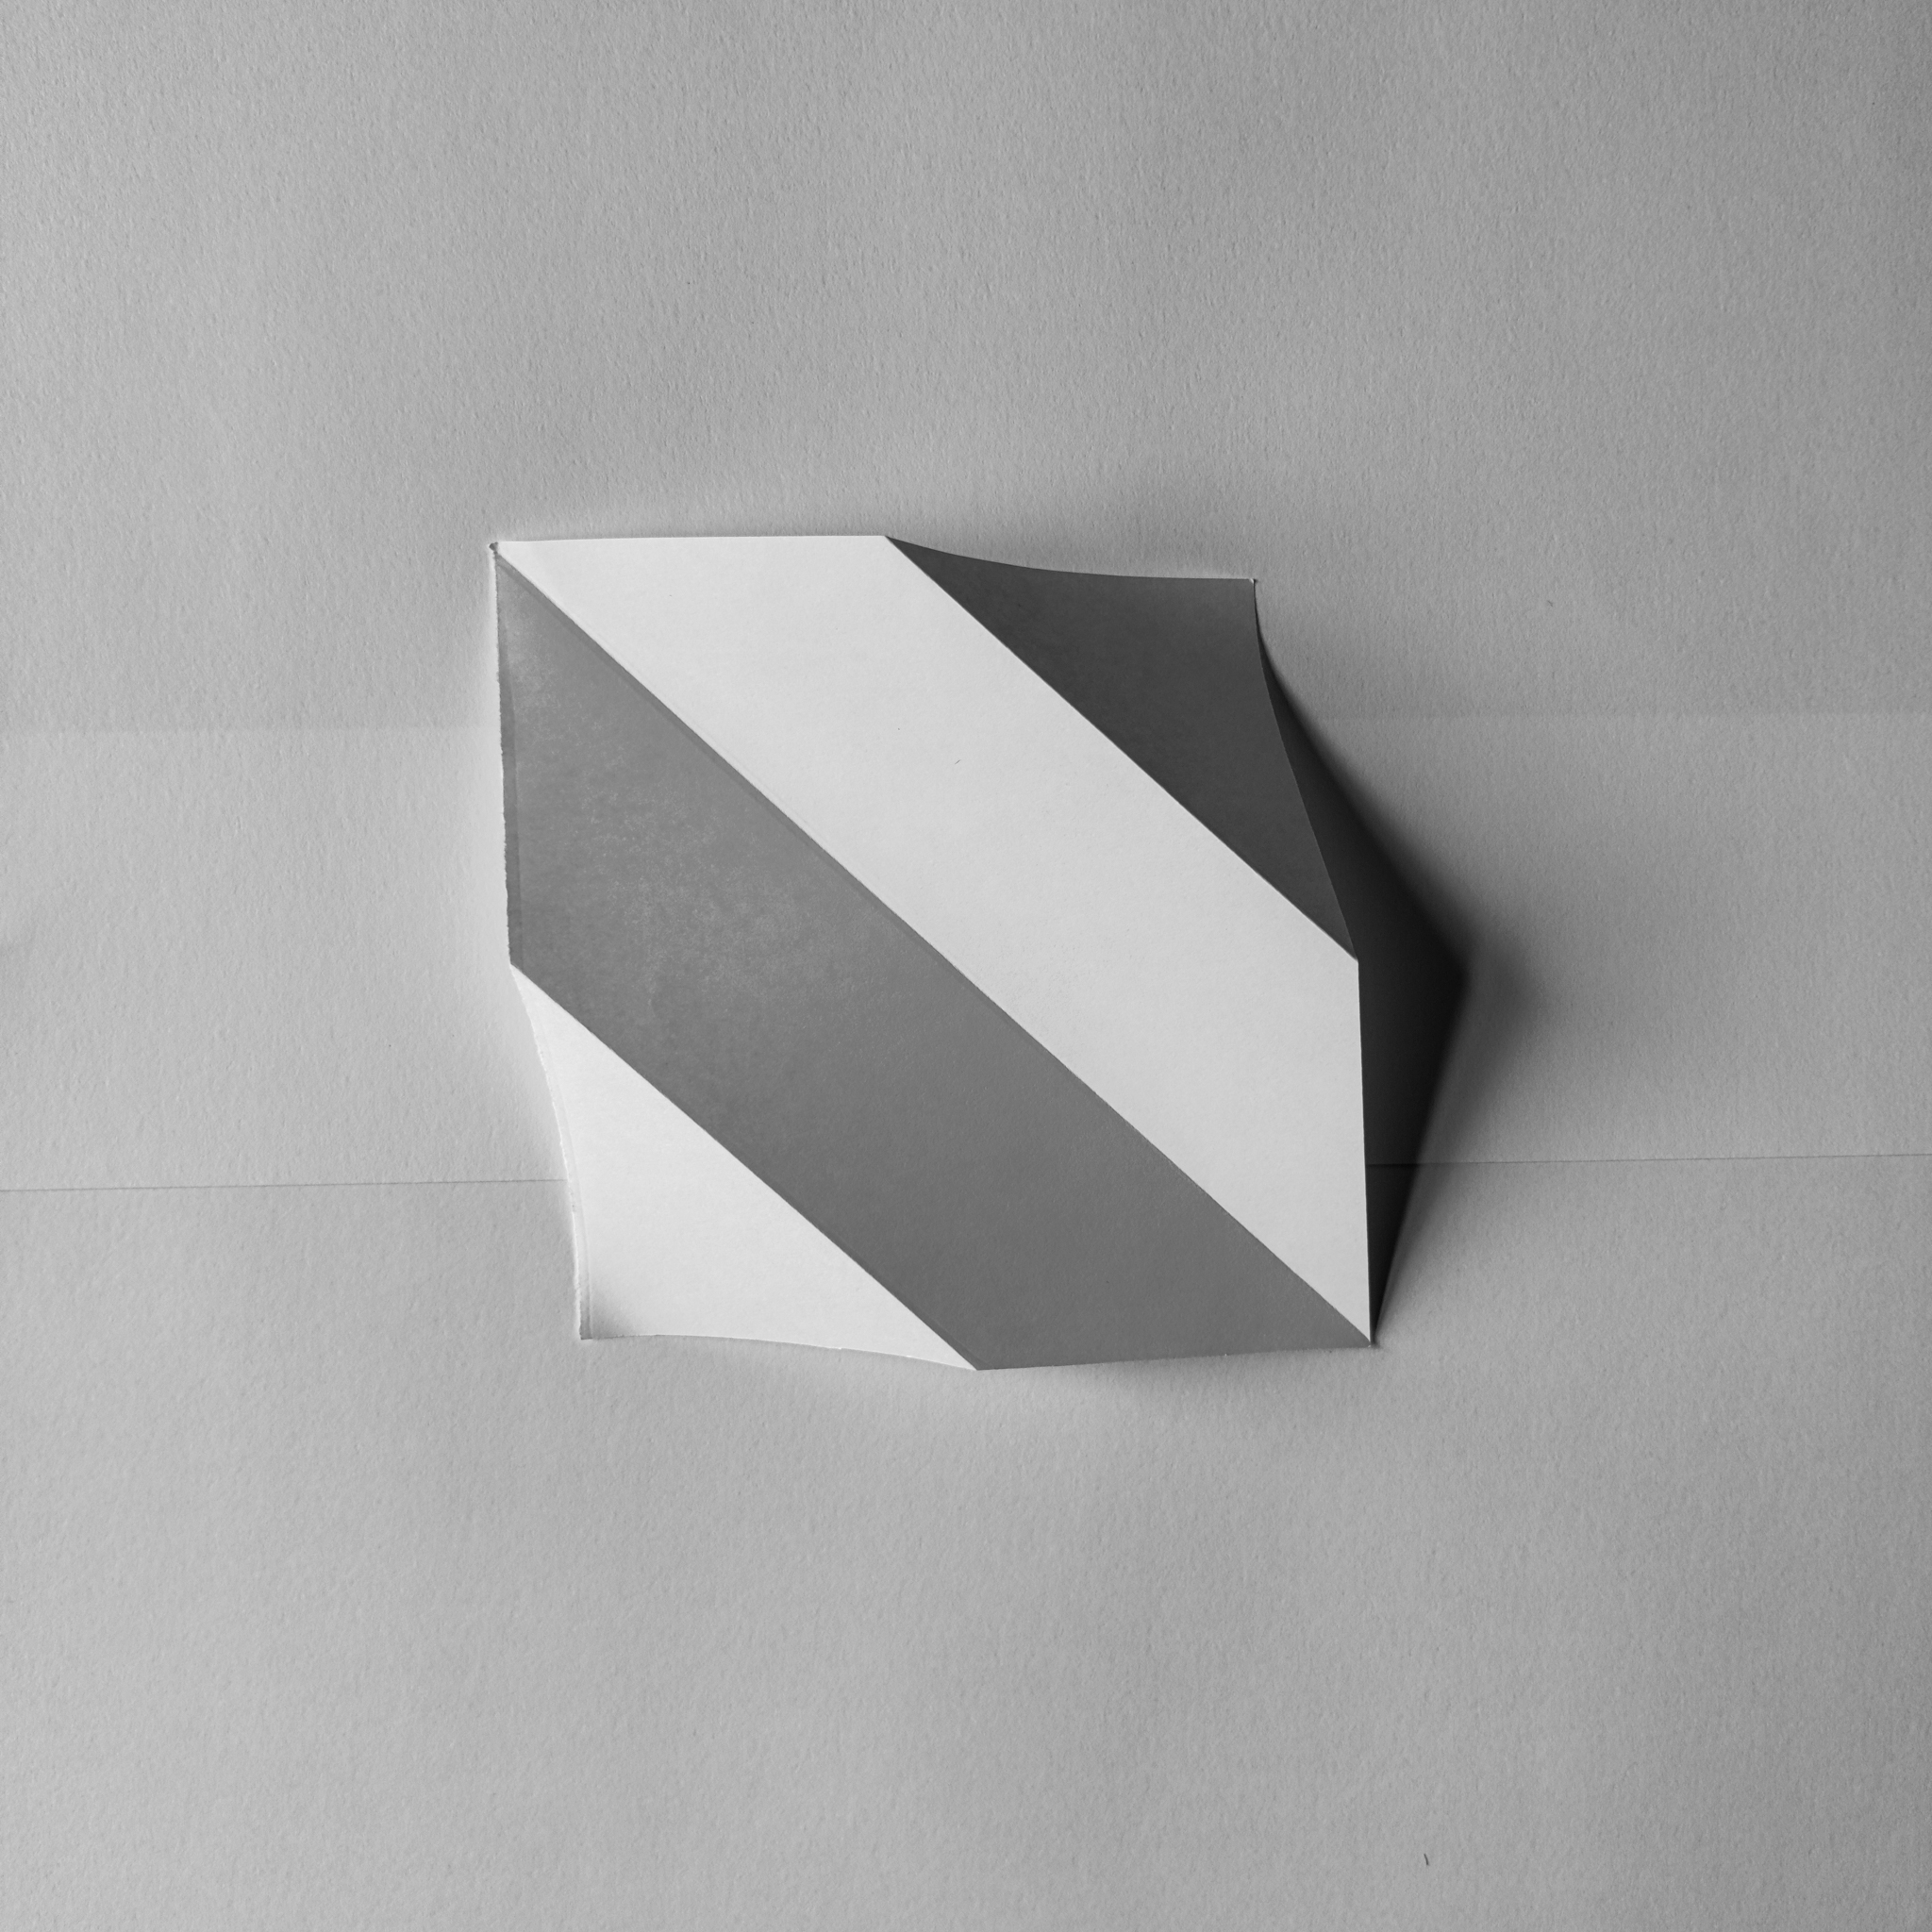
In this photograph, I have focused on the repetitive patterns/shapes on the subject. However, after looking back at it now, I feel I should have adjusted the focal range. The subject seems to look distorted, which will impact my decision on my final image selection.
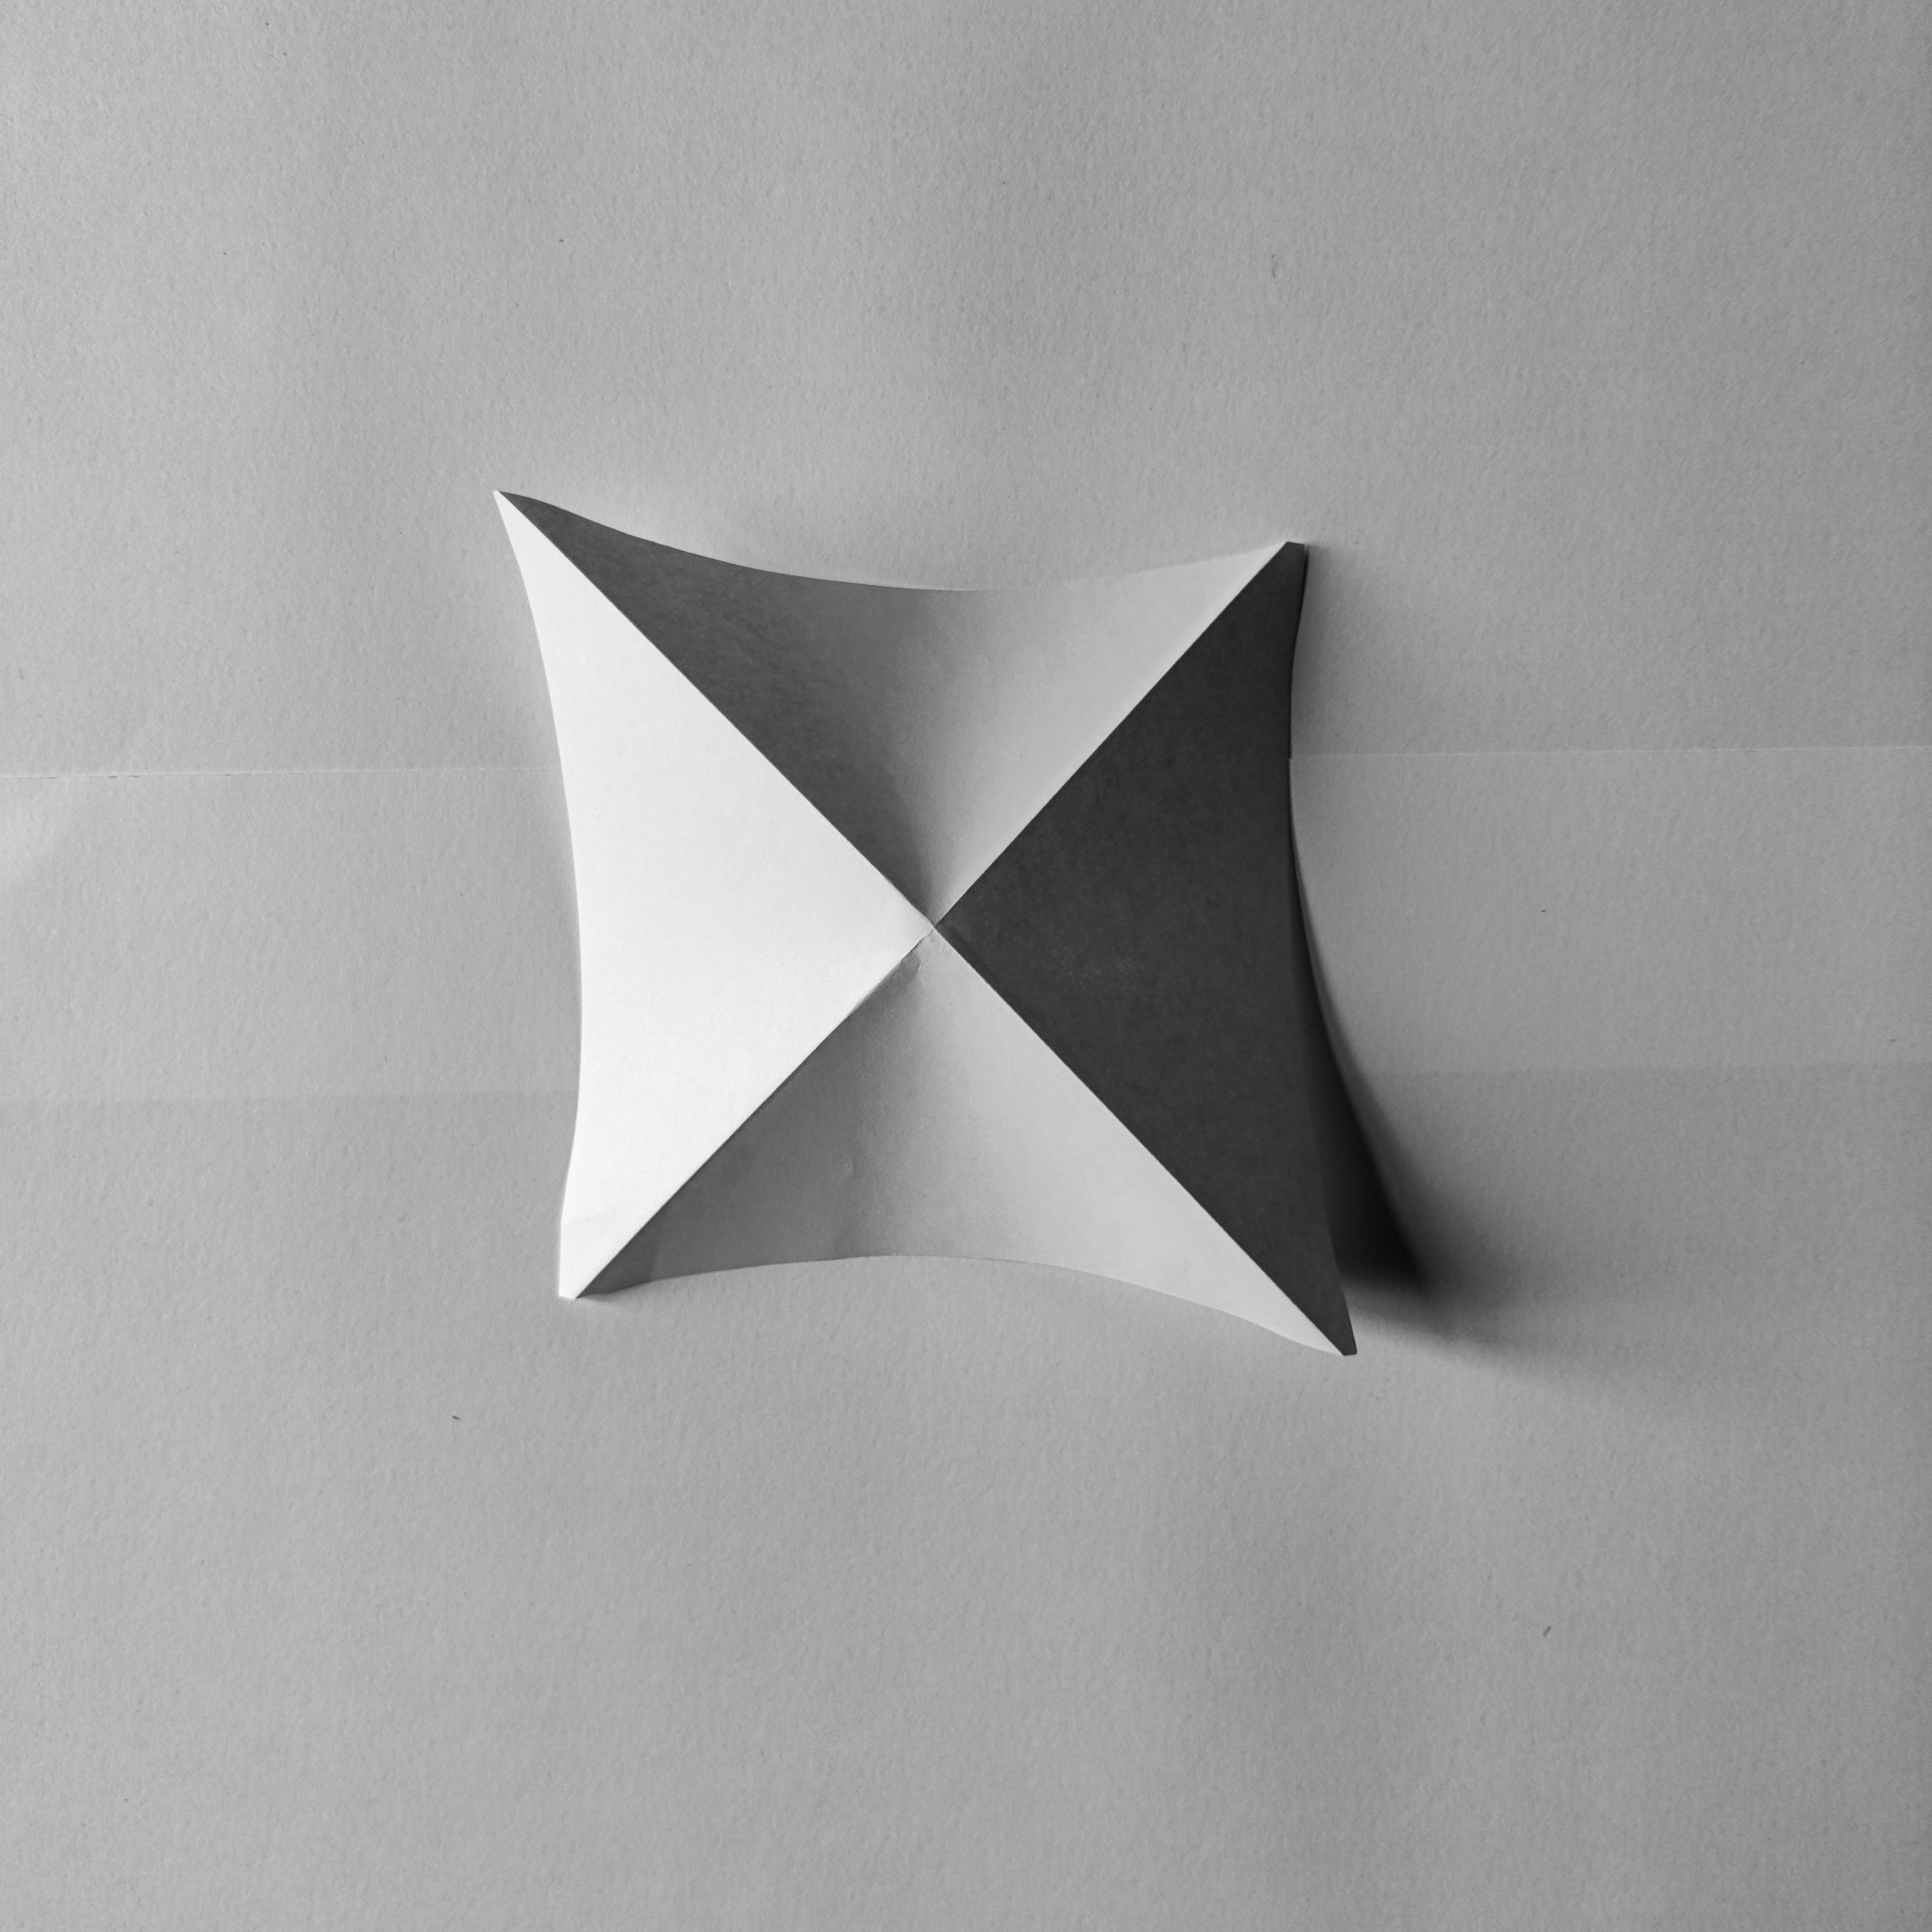
Here I used a 2.3 mm lens. This had an excellent effect on my image. I was able to take the picture further away, while not sacrificing any quality and focus.
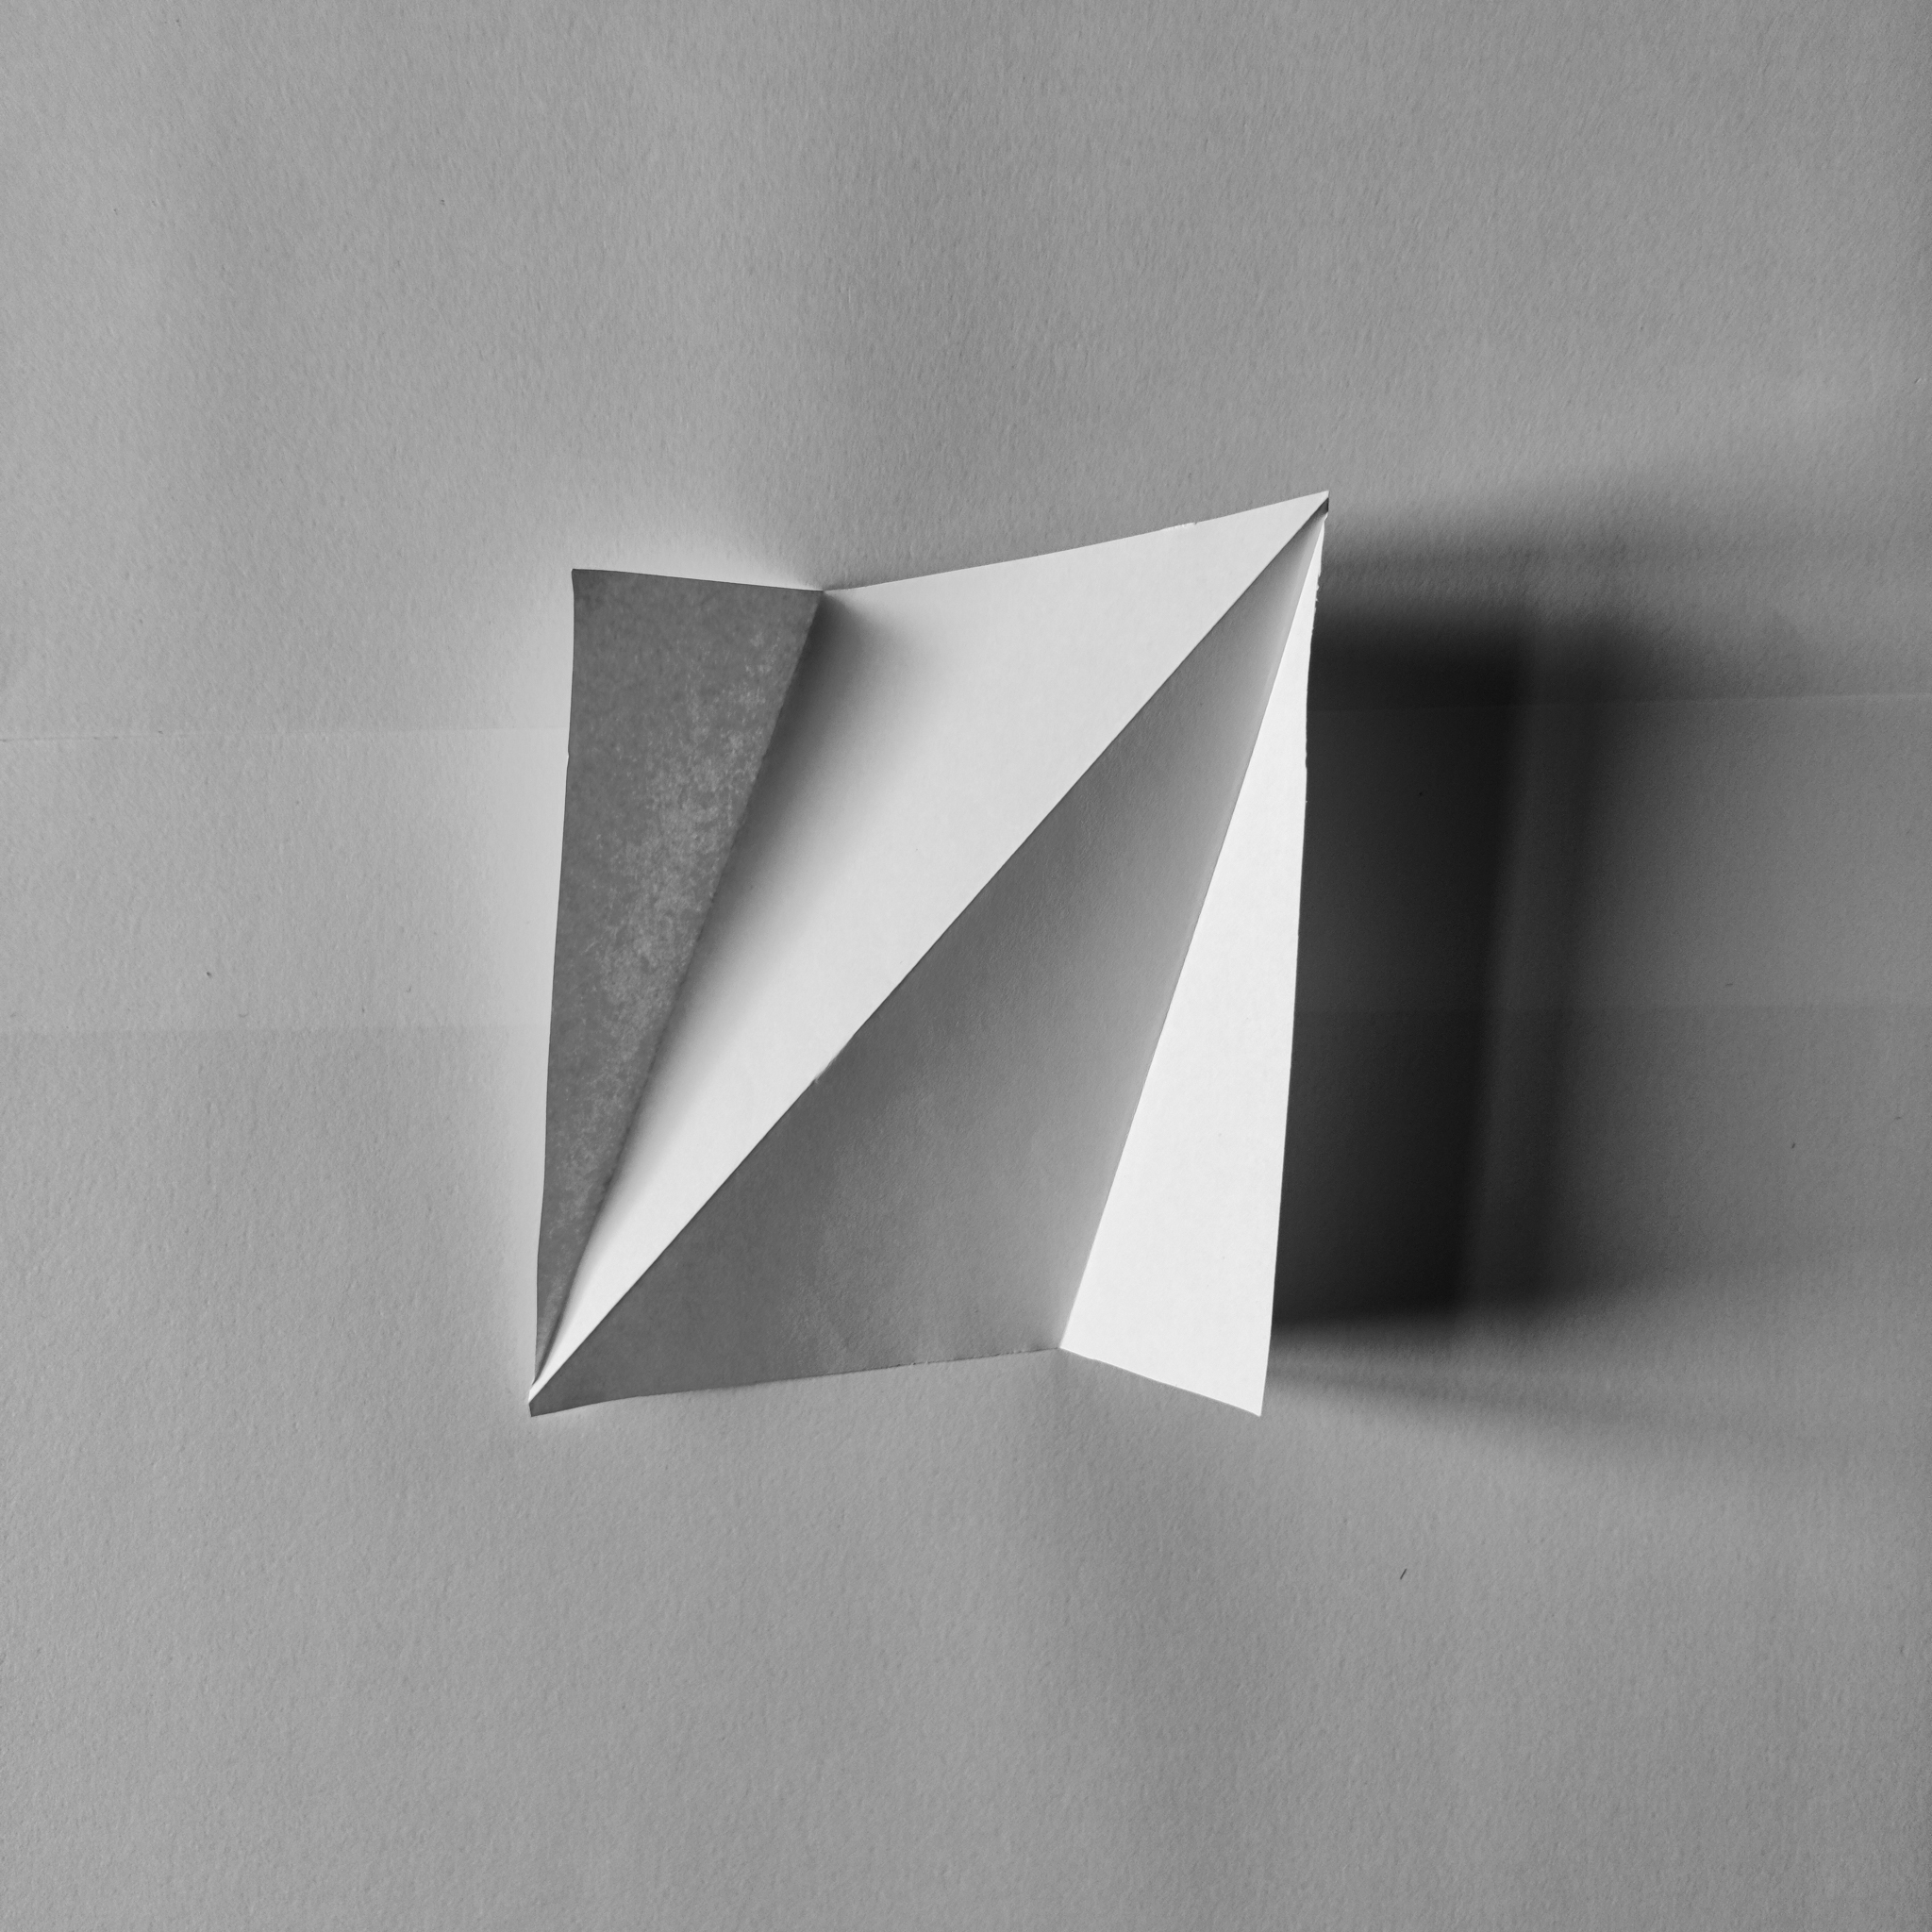
This image to me reflects a pyramid. The way it was taken as if you were on a drone. Also, The sharp contrast on each fold gives so much character.
Overall my final image turned out how I wanted. It was not soft, it was very sharp, which helped create hard contrast on those sharp folds. Visually the photo is very pleasing compared to the other two because of the composition. It is not too close to the subject, compared to the others which helped with the focal distance. This was the main reason why I picked this image. Unlike the others you cant see most of the subject, they are mainly focused on one aspect. Compared to this image, you can see the majority of the folds, even though the focal point is set to the point of the "pyramid"
I used a lot of technical qualities regarding the camera and equipment. I used a smaller aperture, so I could get a bigger depth of field. Which also helped me get the background in the shot. All three shots were taken in a "studio" like setup which help the constancy between them. However, the difference in the final image was the angle of light. I shifted the light slightly lower, to help create the hard contrast on the folds. Which contributed to my decisions
I gained a lot of knowledge while taking these images. In the beginning, I was not quite sure the look I was shooting and I had to test to find the correct amount of light angles. After taking around 57 images I began to find the style I was after, which was reflected in the final image.

